Tuesday 15 September 2015

Friday 11 September 2015

SQL SERVER – Who Dropped Table or Database?

I used to run a series on Hero’s and Sherlock Holmes is one of my favorite. There is always a need to get to the bottom of the problem statement and whether you are a developer or a DBA, at least once you might have been asked one of the following “Who” question after a disaster.
  • Who dropped table in the database? From which application? When?
  • Who dropped database? What was the date and time?
  • Who created database on production server?
  • Who altered the database?
  • Who dropped the schema?
  • Who altered the schema?
And there are many other similar questions. Generally rich companies have auditing enabled and they have many tools which might be capturing all DDLs via either Auditing or via 3rd party tools.  Many of DBAs and developer don’t know that there is a default trace which runs in the background in every SQL Server installation
Here are few usage of default traces which are via SSMS.
Let’s look at the events captured by the default trace.
SELECT DISTINCT Trace.Event_ID, TraceEvents.NAME AS Event_Desc
FROM   ::fn_trace_geteventinfo(1) Trace
,sys.trace_events TraceEvents
WHERE Trace.eventID = TraceEvents.trace_event_id
Here is what we would get in SQL Server 2014
Event_ID Event_Desc
18 Audit Server Starts And Stops
20 Audit Login Failed
22 ErrorLog
46 Object:Created
47 Object:Deleted
55 Hash Warning
69 Sort Warnings
79 Missing Column Statistics
80 Missing Join Predicate
81 Server Memory Change
92 Data File Auto Grow
93 Log File Auto Grow
94 Data File Auto Shrink
95 Log File Auto Shrink
102 Audit Database Scope GDR Event
103 Audit Schema Object GDR Event
104 Audit Addlogin Event
105 Audit Login GDR Event
106 Audit Login Change Property Event
108 Audit Add Login to Server Role Event
109 Audit Add DB User Event
110 Audit Add Member to DB Role Event
111 Audit Add Role Event
115 Audit Backup/Restore Event
116 Audit DBCC Event
117 Audit Change Audit Event
152 Audit Change Database Owner
153 Audit Schema Object Take Ownership Event
155 FT:Crawl Started
156 FT:Crawl Stopped
164 Object:Altered
167 Database Mirroring State Change
175 Audit Server Alter Trace Event
218 Plan Guide Unsuccessful
As we can see there are various interesting events. Object:Altered, Object:Created and Object:Deleted can help us in identifying who dropped, altered or created any object. Once we get event class ID for the event of interest, we can use below query and replace the Event class ID.
-- read all available traces.
DECLARE @current VARCHAR(500);
DECLARE @start VARCHAR(500);
DECLARE @indx INT;
SELECT @current = path
FROM sys.traces
WHERE is_default = 1;
SET @current = REVERSE(@current)
SELECT @indx = PATINDEX('%\%', @current)
SET @current = REVERSE(@current)
SET @start = LEFT(@current, LEN(@current) - @indx) + '\log.trc';
-- CHNAGE FILER AS NEEDED
SELECT *
FROM::fn_trace_gettable(@start, DEFAULT)
WHERE EventClass IN (92,93) -- growth event
ORDER BY StartTime DESC
In above, I have used EventClass 92 and 93 to track database auto-growth events. Here is the query to find who dropped / created or altered object in database or database itself.
-- read all available traces.
DECLARE @current VARCHAR(500);
DECLARE @start VARCHAR(500);
DECLARE @indx INT;
SELECT @current = path
FROM sys.traces
WHERE is_default = 1;
SET @current = REVERSE(@current)
SELECT @indx = PATINDEX('%\%', @current)
SET @current = REVERSE(@current)
SET @start = LEFT(@current, LEN(@current) - @indx) + '\log.trc';
-- CHNAGE FILER AS NEEDED
SELECT CASE EventClass
WHEN 46 THEN 'Object:Created'
WHEN 47 THEN 'Object:Deleted'
WHEN 164 THEN 'Object:Altered'
END, DatabaseName, ObjectName, HostName, ApplicationName, LoginName, StartTime
FROM::fn_trace_gettable
(@start, DEFAULT)
WHERE EventClass IN (46,47,164) AND EventSubclass = 0 AND DatabaseID <> 2
ORDER BY StartTime DESC
Have you ever heard of someone being fired based on such auditing?

Google Translator

Note:
GoogleTranslator was originally written when screen scraping was the only way to access Google's online translation tools. As has been rightly pointed out in this article's forum, a more modern approach would be to use Google's AJAX APIs. See this link for more information. This screen scraper version of GoogleTranslator continues to be maintained at the request of CP readers.

This latest version of GoogleTranslator utilizes Google Translate's AJAX APIs to translate text and retrieves the translation by parsing the returned JSON content. Thanks to CPians @Member 9899010 and @bgsjust for pointing me to these APIs. The latest version of the code also includes the ability to speak the translation from the demo app. Because Google limits the speech to common words in a few languages, don't be surprised if the demo plays dumb when you try to speak your translated text!

What is it?

GoogleTranslator in action GoogleTranslator is an object that allows you to translate text using the power of Google's online language tools. The demo app also allows you to easily perform a reverse translation. The app can be used as a poor man's resource translator for simple phrases, but you'd be wise to confirm the translation with a native speaker before using the results.

How do I use it?

You use GoogleTranslator by constructing it and calling its Translate() method.
 
    using RavSoft.GoogleTranslator;
    
    Translator t = new GoogleTranslator();
    string translation = t.Translate ("Hello, how are you?", "English", "French");
    Console.WriteLine (translation);
    Console.WriteLine ("Translated in " + t.TranslationTime.TotalMilliseconds + " mSec");
    Console.WriteLine ("Translated speech = " + t.TranslationSpeechUrl);

How it works

GoogleTranslator works by directly invoking Google's translation API called by its online translation form and parsing the results.
 
    // Initialize
    this.Error = null;
    this.TranslationSpeechUrl = null;
    this.TranslationTime = TimeSpan.Zero;
    DateTime tmStart = DateTime.Now;
    string translation = string.Empty;

    try {
        // Download translation
        string url = string.Format ("https://translate.google.com/translate_a/single?client=t&sl={0}" +
                                    "&tl={1}&hl=en&dt=bd&dt=ex&dt=ld&dt=md&dt=qc&dt=rw&dt=rm&dt=ss&dt=t" +
                                    "&dt=at&ie=UTF-8&oe=UTF-8&source=btn&ssel=0&tsel=0&kc=0&q={2}",
                                    Translator.LanguageEnumToIdentifier (sourceLanguage),
                                    Translator.LanguageEnumToIdentifier (targetLanguage),
                                    HttpUtility.UrlEncode (sourceText));
        string outputFile = Path.GetTempFileName();
        using (WebClient wc = new WebClient ()) {
            wc.Headers.Add ("user-agent", "Mozilla/5.0 (Windows NT 6.1) AppleWebKit/537.36 " +
                                          "(KHTML, like Gecko) Chrome/41.0.2228.0 Safari/537.36");
            wc.DownloadFile(url, outputFile);
        }

        // Get translated text
        if (File.Exists (outputFile)) {

            // Get phrase collection
            string text = File.ReadAllText(outputFile);
            int index = text.IndexOf (string.Format(",,\"{0}\"", Translator.LanguageEnumToIdentifier (sourceLanguage)));
            if (index == -1) {
                // Translation of single word
                int startQuote = text.IndexOf('\"');
                if (startQuote != -1) {
                    int endQuote = text.IndexOf('\"', startQuote + 1);
                    if (endQuote != -1) {
                        translation = text.Substring(startQuote + 1, endQuote - startQuote - 1);
                    }
                }
            }
            else {
                // Translation of phrase
                text = text.Substring(0, index);
                text = text.Replace("],[", ",");
                text = text.Replace("]", string.Empty);
                text = text.Replace("[", string.Empty);
                text = text.Replace("\",\"", "\"");
            }

            // Get translated phrases
            string[] phrases = text.Split (new[] { '\"' }, StringSplitOptions.RemoveEmptyEntries);
            for (int i=0; (i < phrases.Count()); i += 2) {
                string translatedPhrase = phrases[i];
                if (translatedPhrase.StartsWith(",,")) {
                    i--;
                    continue;
                }
                translation += translatedPhrase + "  ";
            }

            // Fix up translation
            translation = translation.Trim();
            translation = translation.Replace(" ?", "?");
            translation = translation.Replace(" !", "!");
            translation = translation.Replace(" ,", ",");
            translation = translation.Replace(" .", ".");
            translation = translation.Replace(" ;", ";");

            // And translation speech URL
            this.TranslationSpeechUrl = string.Format ("https://translate.google.com/translate_tts?ie=UTF-8"+
                                                       "&q={0}&tl={1}&total=1&idx=0&textlen={2}&client=t",
                                                       HttpUtility.UrlEncode (translation),
                                                       Translator.LanguageEnumToIdentifier (targetLanguage),
                                                       translation.Length);
        }
    }
    catch (Exception ex) {
        this.Error = ex;
    }

    // Return result
    this.TranslationTime = DateTime.Now - tmStart;
    return translation;

Working with .resx Files Programmatically

Because XML resource (.resx) files must consist of well-defined XML, including a header that must follow a specific schema followed by data in name/value pairs, you may find that creating these files manually is error-prone. As an alternative, you can create .resx files programmatically by using types and members in the .NET Framework Class Library. You can also use the .NET Framework Class Library to retrieve resources that are stored in .resx files. This topic explains how you can use the types and members in the System.Resources namespace to work with .resx files.
Caution noteCaution
There are also ways to work with .resx files other than programmatically. When you add a resource file to a Visual Studio project, Visual Studio provides an interface for creating and maintaining a .resx file, and automatically converts the .resx file to a .resources file at compile time. You can also use a text editor to manipulate a .resx file directly. However, to avoid corrupting the file, be careful not to modify any binary information that is stored in the file.

You can use the System.Resources.ResXResourceWriter class to create a .resx file programmatically, by following these steps:
  1. Instantiate a ResXResourceWriter object by calling the ResXResourceWriter.ResXResourceWriter(String) method and supplying the name of the .resx file. The file name must include the .resx extension. If you instantiate the ResXResourceWriter object in a using block, you do not explicitly have to call the ResXResourceWriter.Close method in step 3.
  2. Call the ResXResourceWriter.AddResource method for each resource you want to add to the file. Use the overloads of this method to add string, object, and binary (byte array) data. If the resource is an object, it must be serializable.
  3. Call the ResXResourceWriter.Close method to generate the resource file and to release all resources. If the ResXResourceWriter object was created within a using block, resources are written to the .resx file and the resources used by the ResXResourceWriter object are released at the end of the using block.
The resulting .resx file has the appropriate header and a data tag for each resource added by the ResXResourceWriter.AddResource method.
Caution noteCaution
Do not use resource files to store passwords, security-sensitive information, or private data.
The following example creates a .resx file named CarResources.resx that stores six strings, an icon, and two application-defined objects (two Automobile objects). Note that the Automobile class, which is defined and instantiated in the example, is tagged with the SerializableAttribute attribute.
using System;
using System.Drawing;
using System.Resources;

[Serializable()] public class Automobile
{
   private string carMake;
   private string carModel;
   private int carYear;
   private int carDoors;
   private int carCylinders;

   public Automobile(string make, string model, int year) :  
                     this(make, model, year, 0, 0)   
   { }

   public Automobile(string make, string model, int year, 
                     int doors, int cylinders)
   {                     
      this.carMake = make;
      this.carModel = model;
      this.carYear = year;
      this.carDoors = doors;
      this.carCylinders = cylinders;
   }

   public string Make {
      get { return this.carMake; }
   }       

   public string Model {
      get {return this.carModel; }
   }       

   public int Year {
      get { return this.carYear; }
   }       

   public int Doors {
      get { return this.carDoors; }
   }       

   public int Cylinders {
      get { return this.carCylinders; }
   }       
}

public class Example
{
   public static void Main()
   {
      // Instantiate an Automobile object.
      Automobile car1 = new Automobile("Ford", "Model N", 1906, 0, 4);
      Automobile car2 = new Automobile("Ford", "Model T", 1909, 2, 4);
      // Define a resource file named CarResources.resx.
      using (ResXResourceWriter resx = new ResXResourceWriter(@".\CarResources.resx"))
      {
         resx.AddResource("Title", "Classic American Cars");
         resx.AddResource("HeaderString1", "Make");
         resx.AddResource("HeaderString2", "Model");
         resx.AddResource("HeaderString3", "Year");
         resx.AddResource("HeaderString4", "Doors");
         resx.AddResource("HeaderString5", "Cylinders");
         resx.AddResource("Information", SystemIcons.Information); 
         resx.AddResource("EarlyAuto1", car1);  
         resx.AddResource("EarlyAuto2", car2);  
      }
   }
}


Important noteImportant
You can also use Visual Studio to create .resx files. At compile time, Visual Studio uses the Resource File Generator (Resgen.exe) to convert the .resx file to a binary resource (.resources) file, and also embeds it in either an application assembly or a satellite assembly.
You cannot embed a .resx file in a runtime executable or compile it into a satellite assembly. You must convert your .resx file into a binary resource (.resources) file by using the Resource File Generator (Resgen.exe). The resulting .resources file can then be embedded in an application assembly or a satellite assembly. For more information, see Creating Resource Files.

In some cases, you may want to retrieve all resources, instead of a specific resource, from a .resx file. To do this, you can use the System.Resources.ResXResourceReader class, which provides an enumerator for all resources in the .resx file. The System.Resources.ResXResourceReader class implements IDictionaryEnumerator, which returns a DictionaryEntry object that represents a particular resource for each iteration of the loop. Its DictionaryEntry.Key property returns the resource's key, and its DictionaryEntry.Value property returns the resource's value.
The following example creates a ResXResourceReader object for the CarResources.resx file created in the previous example and iterates through the resource file. It adds the two Automobile objects that are defined in the resource file to a System.Collections.Generic.List<T> object, and it adds five of the six strings to a SortedList object. The values in the SortedList object are converted to a parameter array, which is used to display column headings to the console. The Automobile property values are also displayed to the console.
using System;
using System.Collections;
using System.Collections.Generic;
using System.Resources;

public class Example
{
   public static void Main()
   {
      string resxFile = @".\CarResources.resx";
      List<Automobile> autos = new List<Automobile>();
      SortedList headers = new SortedList();

      using (ResXResourceReader resxReader = new ResXResourceReader(resxFile))
      {
         foreach (DictionaryEntry entry in resxReader) {
            if (((string) entry.Key).StartsWith("EarlyAuto"))
               autos.Add((Automobile) entry.Value); 
            else if (((string) entry.Key).StartsWith("Header")) 
               headers.Add((string) entry.Key, (string) entry.Value);      
         } 
      }
      string[] headerColumns = new string[headers.Count];
      headers.GetValueList().CopyTo(headerColumns, 0);
      Console.WriteLine("{0,-8} {1,-10} {2,-4}   {3,-5}   {4,-9}\n", 
                        headerColumns);
      foreach (var auto in autos)                        
         Console.WriteLine("{0,-8} {1,-10} {2,4}   {3,5}   {4,9}", 
                           auto.Make, auto.Model, auto.Year, 
                           auto.Doors, auto.Cylinders);
   }
}
// The example displays the following output:
//       Make     Model      Year   Doors   Cylinders
//       
//       Ford     Model N    1906       0           4
//       Ford     Model T    1909       2           4


In addition to enumerating the items in a .resx file, you can retrieve a specific resource by name by using the System.Resources.ResXResourceSet class. The ResourceSet.GetString(String) method retrieves the value of a named string resource. The ResourceSet.GetObject(String) method retrieves the value of a named object or binary data. The method returns an object that must then be cast (in C#) or converted (in Visual Basic) to an object of the appropriate type.
The following example retrieves a form's caption string and icon by their resource names. It also retrieves the application-defined Automobile objects used in the previous example and displays them in a DataGridView control.
using System;
using System.Collections.Generic;
using System.Drawing;
using System.Resources;
using System.Windows.Forms;

public class CarDisplayApp : Form
{
   private const string resxFile = @".\CarResources.resx";
   Automobile[] cars;

   public static void Main()
   {
      CarDisplayApp app = new CarDisplayApp();
      Application.Run(app);
   }

   public CarDisplayApp()
   {
      // Instantiate controls.
      PictureBox pictureBox = new PictureBox();
      pictureBox.Location = new Point(10, 10);
      this.Controls.Add(pictureBox);
      DataGridView grid = new DataGridView();
      grid.Location = new Point(10, 60);
      this.Controls.Add(grid);

      // Get resources from .resx file.
      using (ResXResourceSet resxSet = new ResXResourceSet(resxFile))
      {
         // Retrieve the string resource for the title.
         this.Text = resxSet.GetString("Title");
         // Retrieve the image.
         Icon image = (Icon) resxSet.GetObject("Information", true);
         if (image != null)
            pictureBox.Image = image.ToBitmap();

         // Retrieve Automobile objects.  
         List<Automobile> carList = new List<Automobile>();
         string resName = "EarlyAuto";
         Automobile auto; 
         int ctr = 1;
         do {
            auto = (Automobile) resxSet.GetObject(resName + ctr.ToString());
            ctr++;
            if (auto != null) 
               carList.Add(auto);
         } while (auto != null);
         cars = carList.ToArray();
         grid.DataSource = cars;
      }
   }
}


multilingual lang Globalization and Localization in ASP.Net MVC 4 using Resource.resx

Download Files:
  Introduction
In simple step I will show you to make you application globalize and localize in MVC 4.

I am writing this article because I found that there are not good and clean example of Globalization and Localization and many developer wont get any proper output from searching on Google . If you go hunting for Globalization and Localization for ASP.NET Webforms then you will get many cool example on this.

I to wrote Globalization and Localization in ASP.NET Webforms here is URL you can have a look at it: What is Globalization and Localization in ASP.Net.

Before starting let's have look at definition of globalization and localization below.

What is Globalization and Localization?

Globalization is the process of designing the application in such a way that it can be used by users from across the globe (multiple cultures).

Localization, on the other hand, is the process of customization to make our application behave depending on the current culture and locale. These two things go together.
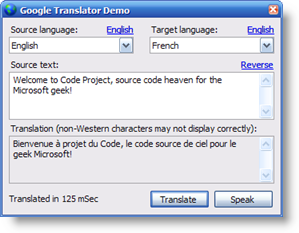
things

Image is used from: Globalization.

Getting Started
Create MVC application

In Visual Studio 2013 select "File" from the menu and inside that select Project and then a New Dialog will popup with the name New project.

Inside that select Templates then select Visual C# and then inside that select web then select ASP.NET MVC 4 Web Application. Name your project "MvcLocalization" and then click OK.

MvcLocalization

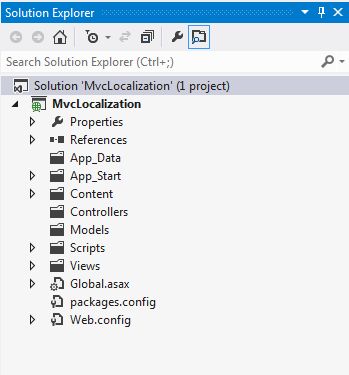
After this let's start with adding a resource to your application.

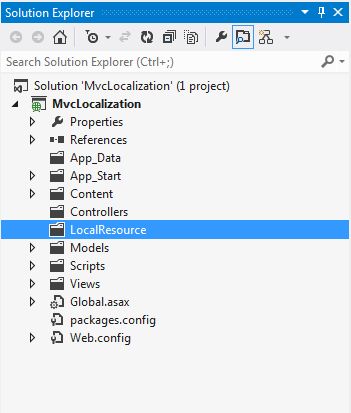
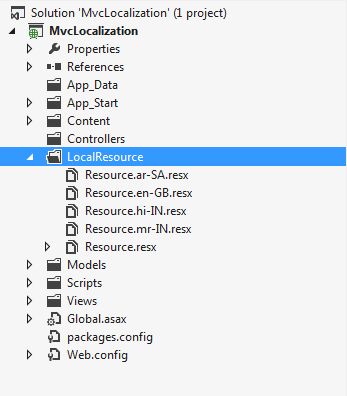
Before adding a resource I am will just create a folder named “LocalResource” and inside this I will add a resource.

LocalResource

Now to add the resource
  • The Main Resource should be “Resource.resx”.
  • For the English you can add "Resource.en-GB.resx".
  • For Marathi you can add "Resource.mr-IN.resx".
  • For Hindi you can add "Resource.hi-IN.resx".
  • For Arabic you can add "Resource.ar-SA.resx".
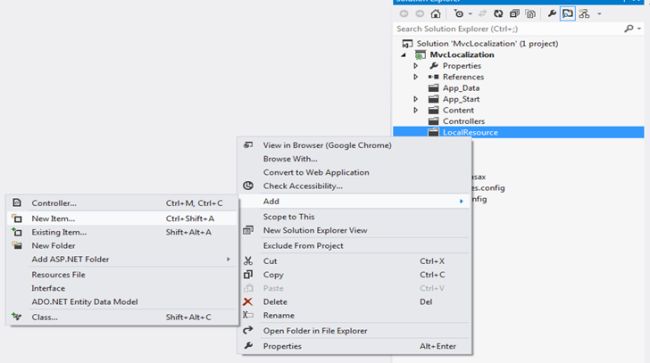
For adding the resource just right-click on the LocalResource folder then for inside what we just added select Add and then New Item.

New Item

A New Dialog will popup with name the Add New Item.

New Dialog

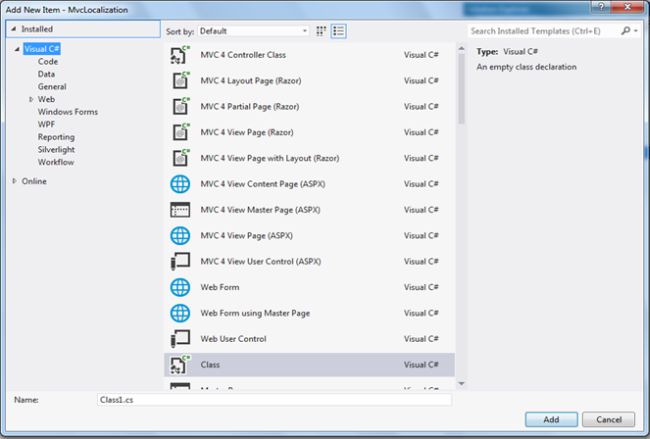
Inside the new dialog at the right side is a search box, type resource.

Resource

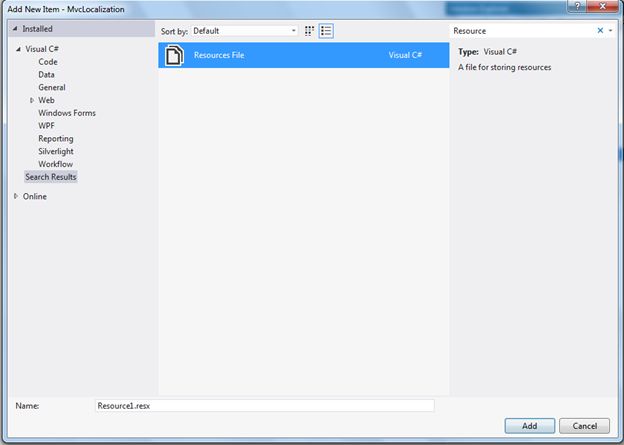
Then I will name my first resource file “Resource.resx”.

In a similar way we will add all other resources with the given names as above.

After adding all the resources your LocalResource folder will look as in the following snapshot.

LocalResource folder

1. Add some data
Let us add some data to these files. Open "Resource.resx".

add some data

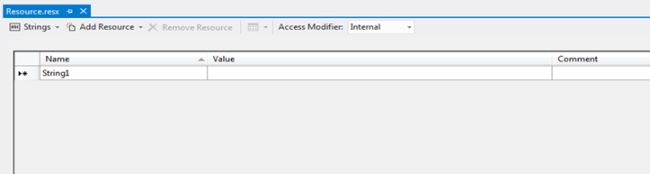
Then just check the Access Modifier dropdownlist and make it Public.

Add a name under the "Resource.resx" Filename column and keep the Value column blank as in the following:

Value column

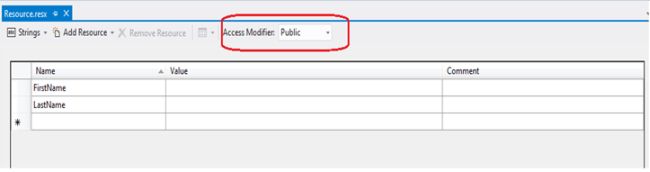
Save and close Resource.resx.
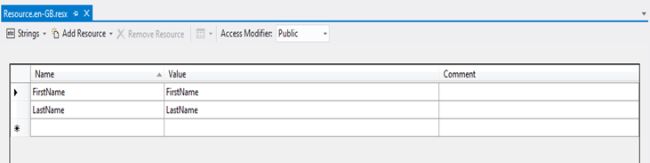
2. Open "Resource.en-GB.resx"
Add a name under the "Resource.en-GB.resx" filename and the value that you want to display in the value field.

Resource page

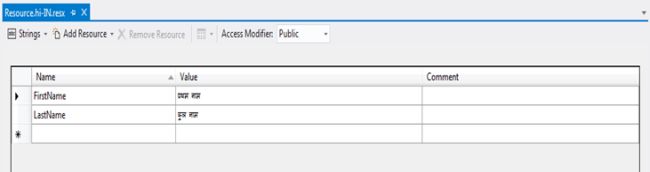
3. Open Resource.hi-IN.resx
Add a name under the "Resource.hi-IN.resx" filename and the value that you want to display in the value field.

value field

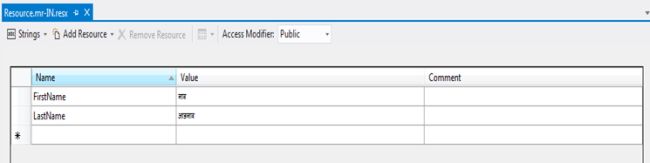
4. Open "Resource.mr-IN.resx"
Add a name under the "Resource.mr-IN.resx" filename and the value that you want to display in the value field.

display in the value field

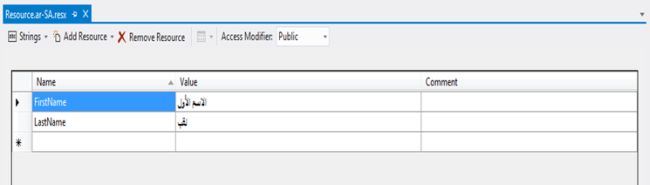
5. Open "Resource.ar-SA.resx"
Add a name under the "Resource.ar-SA.resx" filename and the value that you want to display in the value field.

Add a name

Adding Model and Attribute to Properties.
Now add a model with the name “Userdetails.cs” and then add a display attribute with the name similar to the resource “Name” column and then add ResourceType = typeof(Resource).
  1. using System;  
  2. using System.Collections.Generic;  
  3. using System.ComponentModel.DataAnnotations;  
  4. using System.Linq;  
  5. using System.Web;  
  6. using MvcLocalization.LocalResource;  
  7.   
  8. namespace MvcLocalization.Models  
  9. {  
  10.     public class Userdetails  
  11.     {  
  12.         [Display(Name = "FirstName", ResourceType = typeof(Resource))]  
  13.         public string FirstName { getset; }  
  14.   
  15.         [Display(Name = "LastName", ResourceType = typeof(Resource))]  
  16.         public string LastName { getset; }  
  17.     }  
  18.          }  
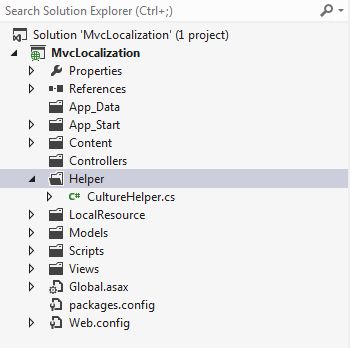
Adding custom class with name CultureHelper.cs
Now after completing the model now add a class with the name “CultureHelper.cs” in the new folder “Helper”. This class sets the Culture with the use of threading.

CultureHelper

Here is a code snippet of the CultureHelper class.
  1. using System;  
  2. using System.Collections.Generic;  
  3. using System.Linq;  
  4. using System.Web;  
  5. using System.Web.SessionState;  
  6. using System.Threading;  
  7. using System.Globalization;  
  8.   
  9. namespace MvcLocalization.Helper  
  10. {  
  11.     public class CultureHelper  
  12.     {  
  13.         protected HttpSessionState session;  
  14.   
  15.         //constructor   
  16.         public CultureHelper(HttpSessionState httpSessionState)  
  17.         {  
  18.             session = httpSessionState;  
  19.         }  
  20.         // Properties  
  21.         public static int CurrentCulture  
  22.         {  
  23.             get  
  24.             {  
  25.                 if (Thread.CurrentThread.CurrentUICulture.Name == "en-GB")  
  26.                 {  
  27.                     return 0;  
  28.                 }  
  29.                 else if (Thread.CurrentThread.CurrentUICulture.Name == "hi-IN")  
  30.                 {  
  31.                     return 1;  
  32.                 }  
  33.                 else if (Thread.CurrentThread.CurrentUICulture.Name == "mr-IN")  
  34.                 {  
  35.                     return 2;  
  36.                 }  
  37.                 else if (Thread.CurrentThread.CurrentUICulture.Name == "ar-SA")  
  38.                 {  
  39.                     return 3;  
  40.                 }  
  41.                 else  
  42.                 {  
  43.                     return 0;  
  44.                 }  
  45.             }  
  46.             set  
  47.             {  
  48.   
  49.                 if (value == 0)  
  50.                 {  
  51.                     Thread.CurrentThread.CurrentUICulture = new CultureInfo("en-GB");  
  52.                 }  
  53.                 else if (value == 1)  
  54.                 {  
  55.                     Thread.CurrentThread.CurrentUICulture = new CultureInfo("hi-IN");  
  56.                 }  
  57.                 else if (value == 2)  
  58.                 {  
  59.                     Thread.CurrentThread.CurrentUICulture = new CultureInfo("mr-IN");  
  60.                 }  
  61.                 else if (value == 3)  
  62.                 {  
  63.                     Thread.CurrentThread.CurrentUICulture = new CultureInfo("ar-SA");  
  64.                 }  
  65.                 else  
  66.                 {  
  67.                     Thread.CurrentThread.CurrentUICulture = CultureInfo.InvariantCulture;  
  68.                 }  
  69.   
  70.             Thread.CurrentThread.CurrentCulture = Thread.CurrentThread.CurrentUICulture;  
  71.   
  72.             }  
  73.         }  
  74.     }  
After adding CultureHelper now we are moving to the Controller.

Adding Controller

In this part we will add 2 Controllers.
  1. BaseController

    We use BaseController in MVC that is inherited by all other controllers. In BaseController, we write common code that can be used in all the pages, for example by setting the language in the current thread for a multilingual site.

  2. HomeController

    This Controller will inherit BaseController.
To add a Controller just right-click on the Controller folder and select Add then inside that select Controller.

BaseController

BaseController

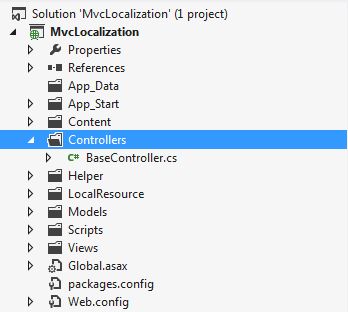
Here is a code snippet of BaseController.
  1. using System;  
  2. using System.Collections.Generic;  
  3. using System.Linq;  
  4. using System.Web;  
  5. using System.Web.Mvc;  
  6. using MvcLocalization.Helper;  
  7.   
  8. namespace MvcLocalization.Controllers  
  9. {  
  10.     public class BaseController : Controller  
  11.     {  
  12.         protected override void ExecuteCore()  
  13.         {  
  14.             int culture = 0;  
  15.             if (this.Session == null || this.Session["CurrentCulture"] == null)  
  16.             {  
  17.          
  18.             int.TryParse(System.Configuration.ConfigurationManager.AppSettings["Culture"], out culture);  
  19.             this.Session["CurrentCulture"] = culture;  
  20.             }  
  21.             else  
  22.             {  
  23.                 culture = (int)this.Session["CurrentCulture"];  
  24.             }  
  25.             // calling CultureHelper class properties for setting  
  26.             CultureHelper.CurrentCulture = culture;  
  27.   
  28.             base.ExecuteCore();  
  29.         }  
  30.   
  31.         protected override bool DisableAsyncSupport  
  32.         {  
  33.             get { return true; }  
  34.         }  
  35.   
  36.     }  
HomeController

HomeController

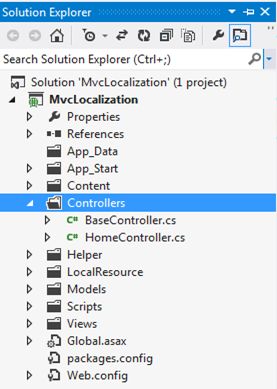
Here is a code snippet of HomeController.
  1. using System;  
  2. using System.Collections.Generic;  
  3. using System.Linq;  
  4. using System.Web;  
  5. using System.Web.Mvc;  
  6. using MvcLocalization.Helper;  
  7. using MvcLocalization.Models;  
  8.   
  9. namespace MvcLocalization.Controllers  
  10. {  
  11.     public class HomeController : BaseController  
  12.     {  
  13.   
  14.         public ActionResult Index()  
  15.         {  
  16.             return View(new Userdetails());  
  17.         }  
  18.   
  19.         public ActionResult ChangeCurrentCulture(int id)  
  20.         {  
  21.             //  
  22.             // Change the current culture for this user.  
  23.             //  
  24.             CultureHelper.CurrentCulture = id;  
  25.             //  
  26.             // Cache the new current culture into the user HTTP session.   
  27.             //  
  28.             Session["CurrentCulture"] = id;  
  29.             //  
  30.             // Redirect to the same page from where the request was made!   
  31.             //  
  32.             return Redirect(Request.UrlReferrer.ToString());  
  33.         }  
  34.     }  
After this we will work on View.

We will first work on _LoginPartial.cshtml because we will add a link button on this page to display it on all pages of the website / application.

_LoginPartial.cshtml code snippet
  1. @using System.Globalization  
  2. @using MvcLocalization  
  3. @using System.Threading;  
  4. @if (Request.IsAuthenticated)  
  5. {  
  6.     <p>  
  7.         Hello, @Html.ActionLink(User.Identity.Name, "ChangePassword""Account",   
  8.         routeValues: null,  
  9.         htmlAttributes: new { @class = "username", title = "Change password" })!  
  10.   
  11.         @Html.ActionLink("Log off""LogOff""Account")  
  12.     </p>  
  13. }  
  14. else  
  15. {  
  16.     <ul>  
  17.         <li>@Html.ActionLink("Register""Register""Account",  
  18.         routeValues: null, htmlAttributes: new { id = "registerLink" })</li>  
  19.   
  20.         <li>@Html.ActionLink("Log in""Login""Account",  
  21.         routeValues: null, htmlAttributes: new { id = "loginLink" })</li>  
  22.     </ul>  
  23. }  
  24.   
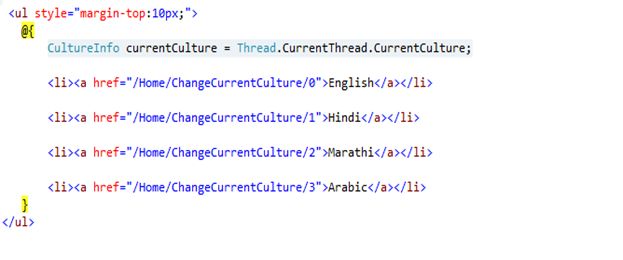
  25. <ul style="margin-top:10px;">  
  26.     @{  
  27.         CultureInfo currentCulture = Thread.CurrentThread.CurrentCulture;  
  28.         
  29.         <li><a href="/Home/ChangeCurrentCulture/0">English</a></li>  
  30.         
  31.         <li><a href="/Home/ChangeCurrentCulture/1">Hindi</a></li>  
  32.                   
  33.         <li><a href="/Home/ChangeCurrentCulture/2">Marathi</a></li>  
  34.           
  35.         <li><a href="/Home/ChangeCurrentCulture/3">Arabic</a></li>  
  36.     }  
  37. </ul> 
Here is the link from where the user will be able to change his website Language.

As we have decided for what language we will use that code.

English :- 0 | Hindi:- 1 | Marathi :- 2 | Arabic :- 3

code

When the user clicks on this link it will call the Home Controller ChangeCurrentCulture Action result and it will pass an id to it.

According to that CultureHelper will get input and it will set the Culture for the page.

Adding View for HomeController

For adding a View just right-click anywhere inside HomeController and select Add View.

Add View

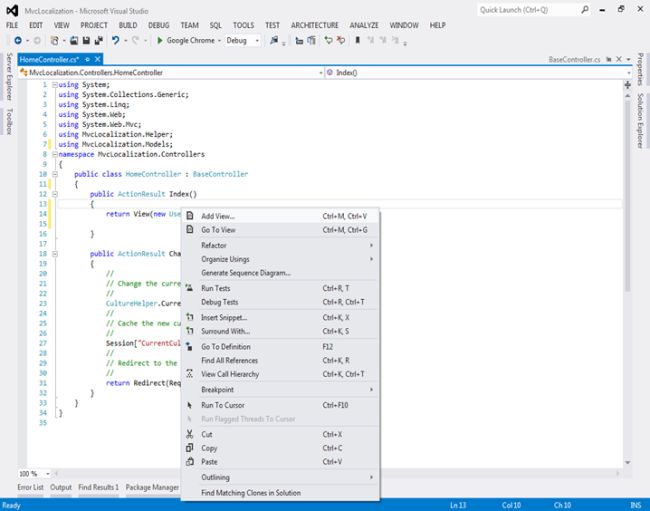
After clicking Add View a new dialog will popup with the name Add View. Inside that you need to select:
  • View engine: Razor.

  • Model Class: Userdetails.

  • Scaffold template: Create.

  • Use a layout or Master page: Check this Property.
Clicking Add View

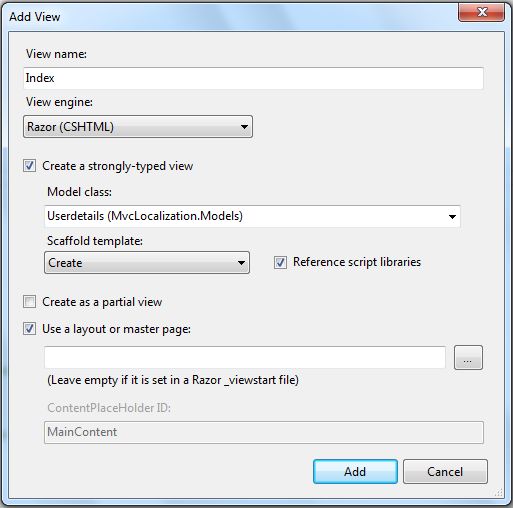
And click on the Add button.

Add click

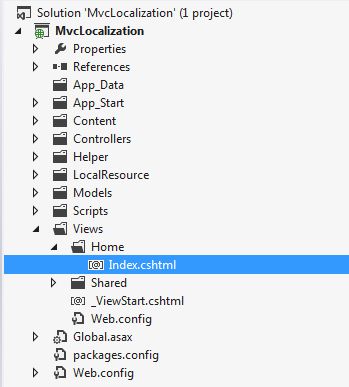
When adding a view using a Scaffold template all the code for the view will be generated.

Index.cshtml code snippet.
  1. @model MvcLocalization.Models.Userdetails  
  2.   
  3. @{  
  4.     ViewBag.Title = "Index";  
  5. }  
  6.   
  7. <h2>Index</h2>  
  8.   
  9. @using (Html.BeginForm()) {  
  10.     @Html.ValidationSummary(true)  
  11.   
  12.     <fieldset>  
  13.         <legend>Userdetails</legend>  
  14.   
  15.         <div class="editor-label">  
  16.             @Html.LabelFor(model => model.FirstName)  
  17.         </div>  
  18.         <div class="editor-field">  
  19.             @Html.EditorFor(model => model.FirstName)  
  20.             @Html.ValidationMessageFor(model => model.FirstName)  
  21.         </div>  
  22.   
  23.         <div class="editor-label">  
  24.             @Html.LabelFor(model => model.LastName)  
  25.         </div>  
  26.         <div class="editor-field">  
  27.             @Html.EditorFor(model => model.LastName)  
  28.             @Html.ValidationMessageFor(model => model.LastName)  
  29.         </div>  
  30.   
  31.         <p>  
  32.             <input type="submit" value="Create" />  
  33.         </p>  
  34.     </fieldset>  
  35. }  
  36.   
  37. <div>  
  38.     @Html.ActionLink("Back to List""Index")  
  39. </div>  
  40.   
  41. @section Scripts {  
  42.     @Scripts.Render("~/bundles/jqueryval")  
Now we have completely configured the code. Now we just need to run the application and check it.
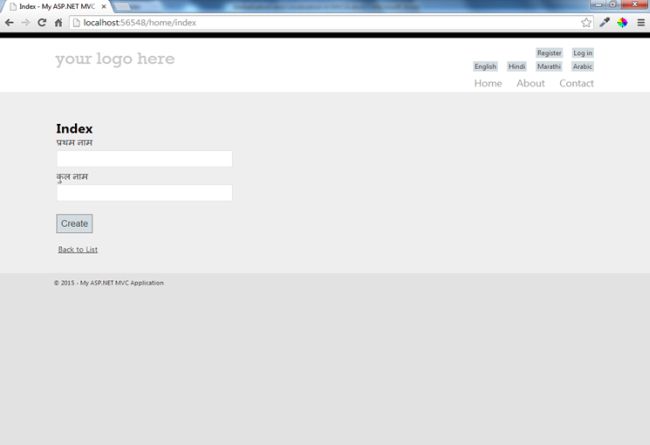
Complete view of page

It's taking the default culture, English, when it loads the first time.

load first time

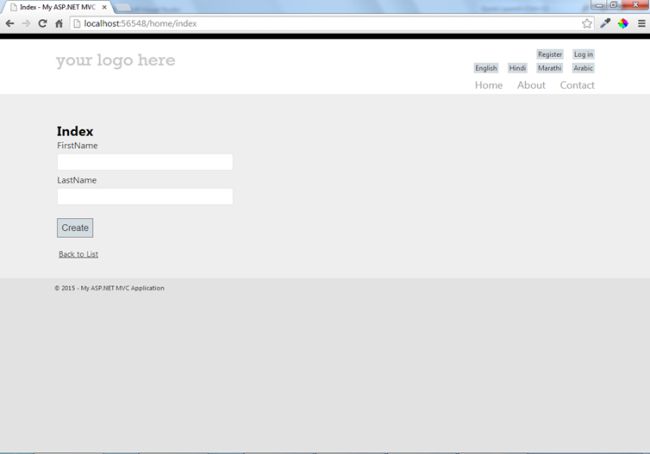
Here is the link we added.

added

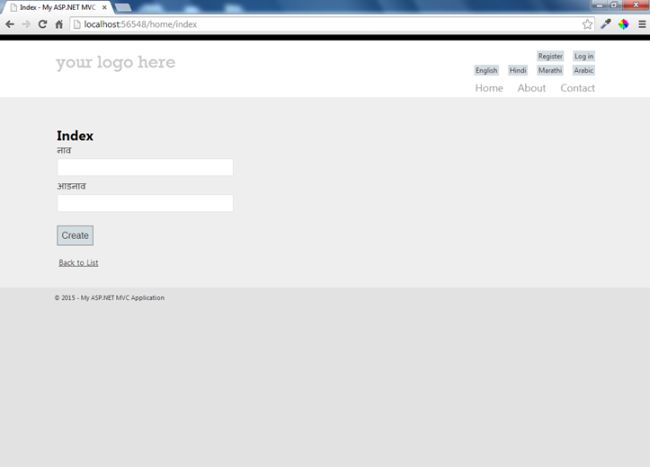
Let's check it by clicking on Hindi first:

check clicking

Now to click on Marathi.

click on Marathi

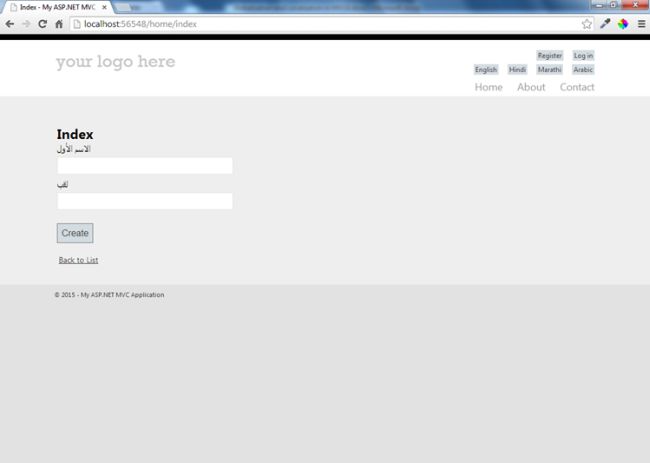
And finally click on Arabic.

click on Arabic

Conclusion

Finally we have completed Globalization and Localization in ASP.NET MVC 4. I hope you have enjoyed it.

You can download this code from the preceding link.

Like this article if you have enjoyed reading it.

Tuesday 8 September 2015

SQL SERVER – Column Alias and Usage in Where Clause

You can assign a new name for a derived column in the SELECT statement which is also known as an alias name. But you need to understand how column alias are assigned and its scope
Let us create the following dataset
CREATE TABLE #temp (prod_id INT, transaction_Date DATETIME, amount DECIMAL(12,2))
INSERT INTO #temp
SELECT 1,'2010-10-10',2700.00 UNION ALL
SELECT 2,'2010-12-07',340 UNION ALL
SELECT 3,'2011-09-03',1200.50 UNION ALL
SELECT 2,'2011-08-11',4100 UNION ALL
SELECT 1,'2012-01-01',17650.50
Suppose you want to find the year of the transaction date and display in the SELECT statement and also order by itself. You can use
SELECT YEAR(transaction_date) AS YEAR,amount FROM #temp
ORDER BY YEAR
Which gives you the following result
year        amount
----------- --------------
2010        2700.00
2010        340.00
2011        4100.00
2011        1200.50
2012        17650.50
But what happens when you run the following?
SELECT YEAR(transaction_date) AS YEAR,amount FROM #temp
WHERE YEAR=2010
You get an error
Msg 207, Level 16, State 1, Line 2
Invalid column name ‘year’.
It is because the column alias are not immediately known to the WHERE clause, whereas it is known in the ORDER BY clause because ORDER BY is executed lastly after the entire column list is known.
For more information about the order of execution in the statement, refer this my earlier blog.